CLICK HERE FOR FREE BLOGGER TEMPLATES, LINK BUTTONS AND MORE! »

Saturday, April 2, 2011

Join Gifts to Grow now and get 100 Free Points.

From knowing exactly when they want teddy to comforting them at 3am, the list of love is endless. Gifts to Grow gives parents the rewards they deserve, simply by buying Pampers diapers and wipes. Join now and get 100 Free Points.

Friday, March 18, 2011

Everything I Always Wanted to Know....I Learned In.....

KINDERGARTEN!

I am beside myself with joy because I learned today that it really might be true, that after 13 long years of asking.....I might be able to move to Kindergarten next school year! The wonderful thing is that I should know by the end of this school year! Whooo hooo! That means that as soon as the children leave in May, I'll be moving my stuff on down the hallway to my very first teaching love.....KINDERGARTEN!

I am so excited!

What grade is your very favorite? Alicia

a month late...be my valentine!


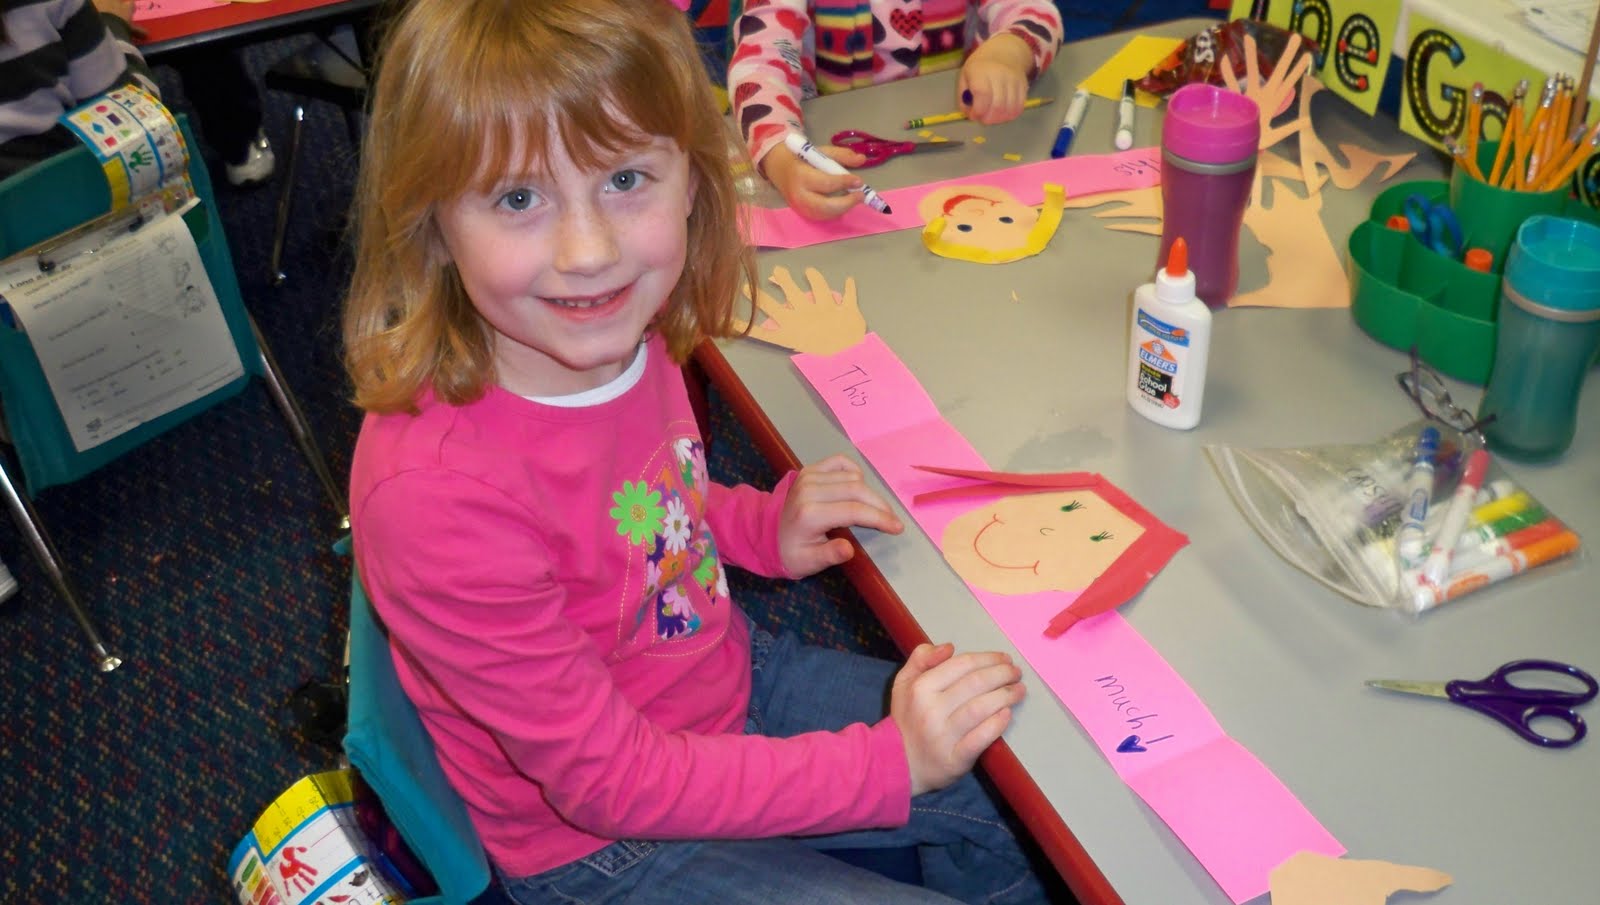
I was going through some pictures just now on my last regular day of Spring Break (because tomorrow is just a regular weekend....) and I noticed that I never posted these super quick, super easy, super cute Valentines!
Materials needed:
one sentence strip per child
one whole sheet of "skin colored" paper (for hands)
one half sheet of "skin colored" paper (for the head)
scraps of "hair colored" paper (we just use what is in our Scrap Box)
glue, markers, crayons
one heart cut out per child

Have the children fold the whole sheet of "skin colored" paper in half and trace their hand. Cut it out (you'll have 2 hands, one will just need to be flipped to get the thumb going the correct way before gluing)

Use a template made from a file folder to create a head pattern. (I just freehand this). The students will trace and cut out the head. Use markers, crayons, and scraps of other paper to make the facial features and the hair.

Glue the head into the center of the sentence strip.

Glue one hand on each end of the sentence strip (make sure you fix it so the thumb is going the right way)

Now fold the sentence strip so that the hands are covering the face. On the left side of the sentence strip (after it has been folded, and just before the hand) write "I". On the right side of the head (just past the hand) write "YOU".

Write the word "LOVE" on the heart and using a baby drop of glue (we call this "a little dab'll do ya) put the heart on the top hand (remember, the hands will be folded over the face)

Open the arms up and on the left side of the face (on the inside of the sentence strip) write "THIS" and on the right side of the face write "MUCH".

Sounds complicated but works beautifully and is easy to make and oh, so cute!!

Hope you can use this one next year! Alicia

Sunday, March 6, 2011

Seussical Week o' Fun


We had a great time this past week with all of our Seuss activities! I think our favorite was reading Horton Hears a Who and then making the Horton hats and Who pencils. Too cute and too fun! Next year, I am going to write their names on the leaves of the Who pencils and then have a parent volunteer stick them in the ground in a huge patch of clover that is right outside our school. We will read the book to the point where Horton is looking through the bazillion clover blooms for the Whos...then we will stop and go looking for our own Who pencils while wearing our Horton hats. (that will help break the story up a bit). This was the only new thing I added this year and I really enjoyed it. I did find some great activities that I want to incorporate next year. I like to change it up a bit each year because I do get tired of the same old same old each time. Hope you enjoy these photos. What kind of Seuss things did you do this year?

Monday, January 31, 2011

Show Me The Money.....

In the great state of Alabama, we are out of money for schools and classrooms. No instructional money has darkened my door since....I cannot tell you when. Fortunately, I have an awesome school where the PTA and the parents get involved and we do not lack for much. Not all of my teacher friends are so lucky. Times are tough all over, I know. We have tons of copy paper at Rock Quarry but are now limited in copies. Across town, they have NO copy limits, but they also have NO paper. Insane!

A few years ago I wrote a grant from http://www.donorschoose.org/ for a classroom set of Leapster HandHeld Games and software and had the grant fully funded in a matter of weeks by a complete stranger. It was quick, easy and fun. In fact, I might need to write a few more of these and get some more fun things coming through the doors of #221. Teachers get bored with the same-old, same-old, too!

My husband buys my copy paper and printer cartridges through the company that he owns when I run out.

How do you get the stuff you need for your classroom? Alicia

Sunday, January 30, 2011

Reading Street Centers


One of the emails from one of my online learning communities just asked a question about managing centers. I thought it might be something that others would be interested in. I love seeing/hearing how everyone works things in their classrooms. This is the way we do it!

We use the flip charts provided by Reading Street (RS) (except technology because we substitute activities on our promethean boards for this center) and we ADD to them. Our reading block is 90 min +. The center charts are a great start, but they take 3 minutes to complete. (I believe that each is listed as 15 minutes, but that is a stretch)Silly to think that it would be enough, but I like it cause it allows me the flexibility to add my own center stuff, things we’ve purchased from Lakeshore, etc…. Here’s how we do it:

We have the crayon pocket chart with red/blue/green/yellow crayons. We have the children divided into mixed ability groups and their names (on a piece of sentence strip) are at the bottom of the chart. One student in each slot on the crayon. We have 18 children so it’s 4-5 names on each crayon. Then at the top of the crayon we put the titles of the centers. For instance the blue crayon might have these centers at the top: Word work (use the flip chart), worksheet (usually one from RS that reinforces the skill taught at word work), then there will be an independent activity (book boxes/read to self) and then something else, like Stamp a Word (where they use letter stamps to stamp and write spelling words).

The other 3 crayons will also have 4-5 centers listed. We try to make it a combo of active learning (where they manipulate or move around or interact) to balance out passive learning (where the sit and take in information) i.e. a listening center.

At the end of the day, you move the center ACTIVITIES to the next crayon (the children stay in the same place) taking the end crayon’s activities and moving it to the first crayon and bumping everything else down one. The students ONLY go to the centers listed on their crayon for that day….Make sense?

Because the children are in mixed ability groups, when you call the blue star readers (all of my groups different are colored stars) there are still some yellows(on level people) to help the greens (below level).

We look at the skills listed on the center flip charts and then we match what we already have. For instance, this week we are doing Where Are All My Animal Friends Unit 3, Story 6. For writing this week (center flip chart) says to write about some ways animals take care of themselves in the winter. I paired this with a non-fiction listening set about baby animals because it covers some of the information they will need to have to write effectively. Then they are doing 2 other activities…..and for the life of me I cannot think of what they are right now….. but you get the point.

Another important thing to know is that there will be 4 crayons x 4-5 centers going on….but not all of the centers are in use at the same times. You will not have pandemonium, going on. It is very controlled and calm. I promise. With the above mentioned 4-5 centers described for listening, only listening will be going on at one time. After they finish listening, they will break apart and move to wherever they want to go to complete the other activities (if it is a worksheet, etc).

We also only do center rotations 4 days per week because specials and unexpected things take up one day. If there is a week where we get it all done by Thursday, then the children who have completed all of their work have some free choice centers on Friday. And of course, Friday is our assessment day. We’ve been doing it this way for years. We’ve only had RS for 3 years, but when we got it we just incorporated the center flip charts and moved on. I hope this helps give you a sense of how we do things. It works for us. How do you do centers in your classroom? Alicia

Sunday, January 16, 2011

Happy New Year!


We had a fun time learning about New Year's Resolutions. I told the children that it was like making a promise to yourself about something you wanted to do better. I encourage them to try and think of something no one else is going to say. That way, I don't get a lot of repeats of "I want to play with my brother/sister/dog/friends." I think my favorite one was from Marlee...."My resolution is...I want to do more cartwheels!" Yes indeed! More cartwheels! Isn't that what childhood is all about?!

So, we made our paper people, very TLC Art style, and added a party hat (triangle flashcard...who knew they had such things) with an Ellison cut star on top and 4-5 itty-bitty stars glued on for effect. The teacher supply store was out of pre-cut party hats so I had to make do. Hot glue a party blower to the mouth and they turned out quite festive. I like the way they look on the black paper.

In first grade, we have a New Year's celebration on the first Friday we are back at school in the new year. Everyone makes a party hat (stapled to a sentence strip. We give each child a party blower, one baggie each of 12 washed, seedless grapes, a pile of confetti, and a long strip of bubble wrap (we have people save this for us all throughout the year). We explain all about the tradition of eating one grape for each month of the year and making a wish for that month. Many Spanish-speaking countries do this and at our school, we've decided to do this instead of toasting with sparkling grape juice. We decided to not portray anything that resembled drinking....just in case! We make our wishes. Count down the last minutes, and let them toss confetti, blow their blowers and twist the bubble wrap! Sounds like fireworks going off! The children love it! The adults love it for about 2 minutes....then the headaches set in! (which is why it happens on a Friday afternoon!) So much fun! I think the best part is that all 5 first grade teachers work together for this little bit of fun! I have a great team. We plan together each summer so we know when our special events are and each person works to lighten the load. Many hands make light work! I'll do a post soon on our awesome day of planning.

What do you do to celebrate the new year? Alicia